How To
Step-by-step instructions to help you complete tasks and solve problems quickly.
Latest Insights
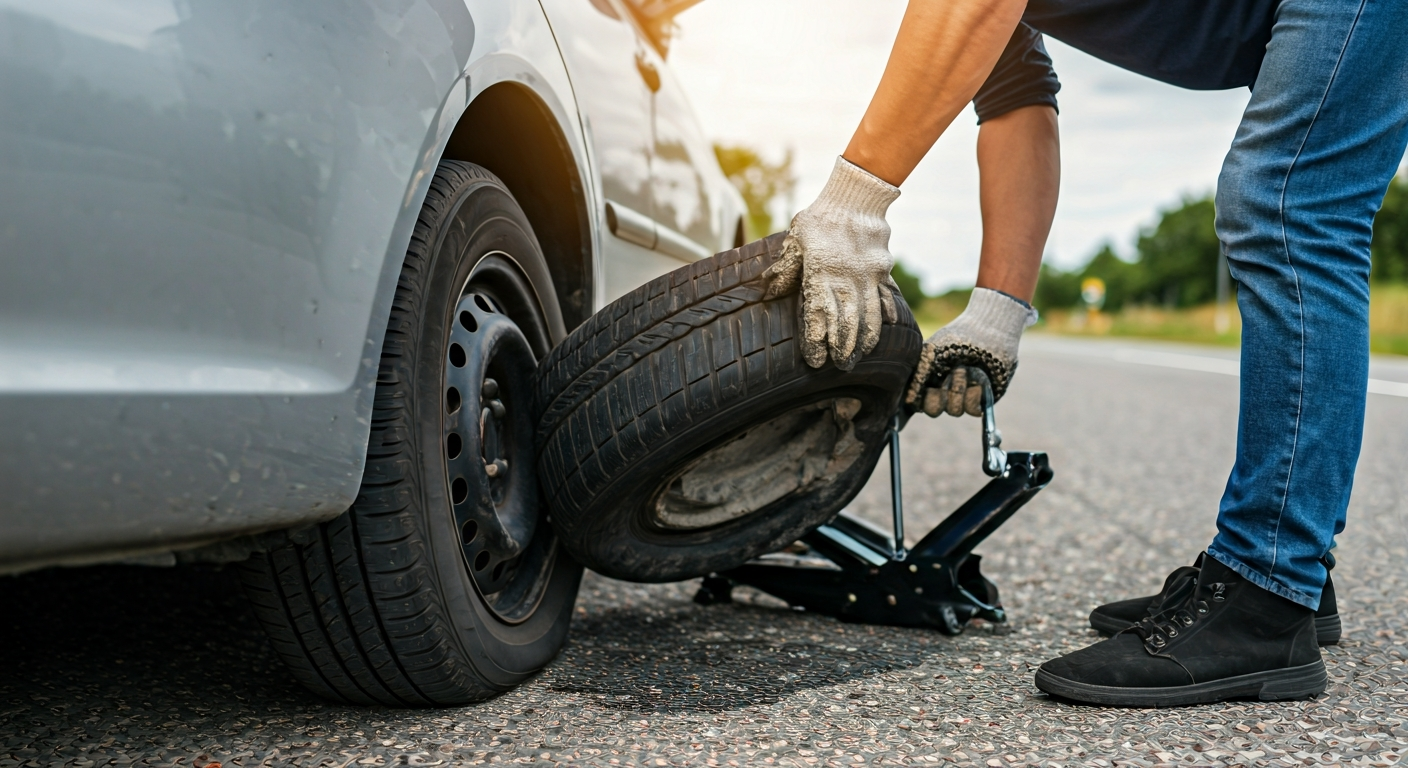
To change a flat tyre, first ensure your vehicle is in a safe location away from traffic. Gather your spare tyre, jack, lug wrench, and owner's manual. Loosen the lug nuts slightly while the car is on the ground, then properly jack up the vehicle. Remove the flat tyre, install the spare, lower the vehicle, and fully tighten the lug nuts. Always check your spare's pressure afterward.
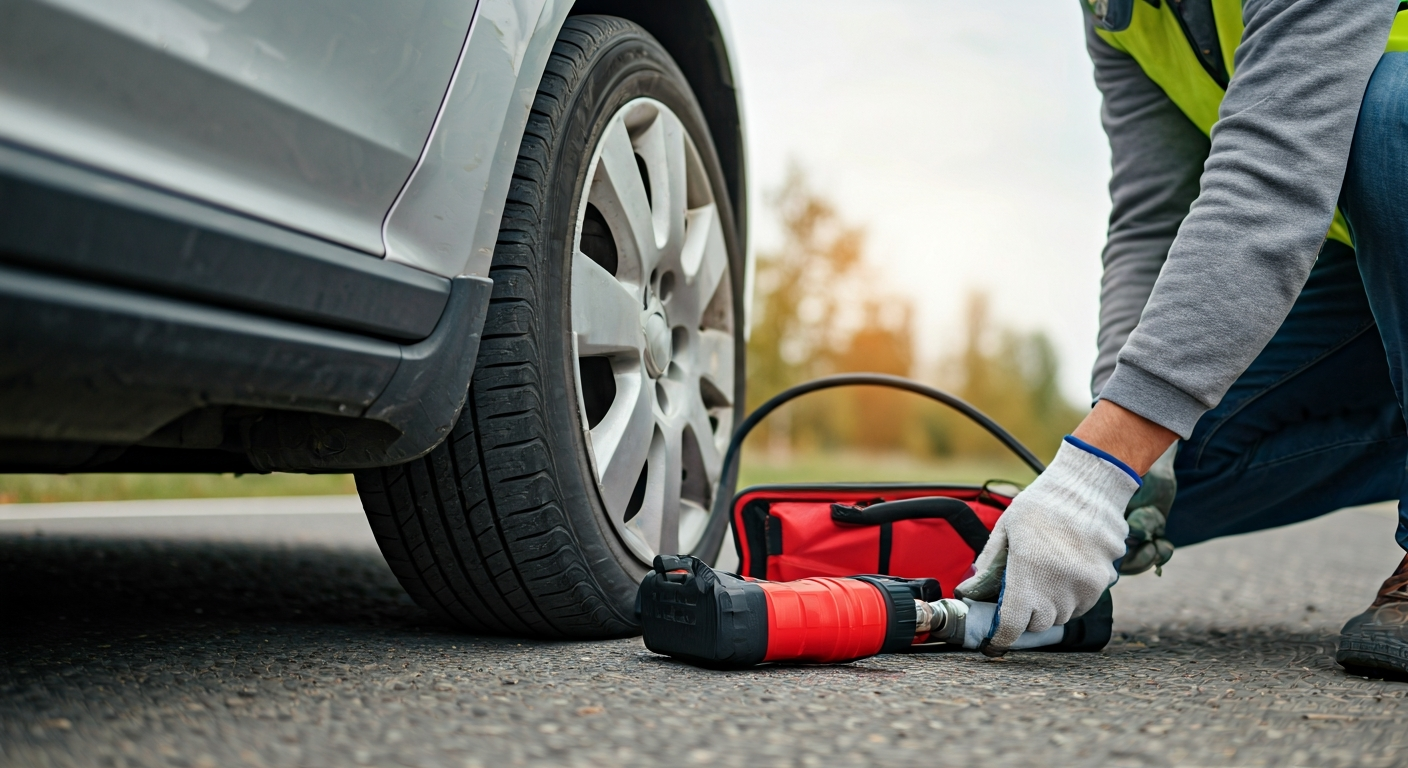
Use an emergency tyre repair kit by first locating and removing the puncture object, if safe to do so. Then, attach the sealant and compressor to the tyre valve. Activate the compressor to inject sealant and reinflate the tyre to the recommended pressure. Drive slowly for a short distance to distribute the sealant, then recheck the pressure before proceeding to a repair shop immediately.
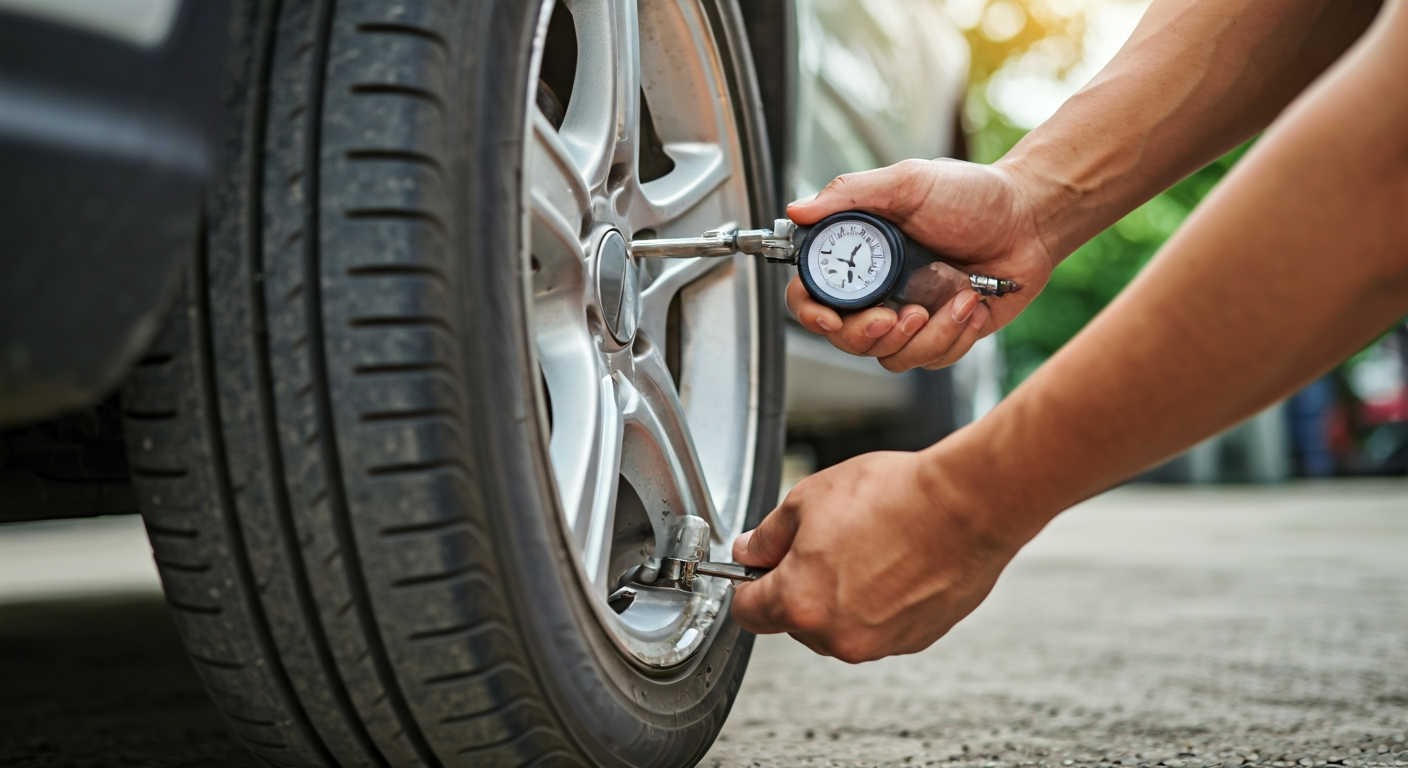
Accurately check tire pressure by using a reliable gauge on "cold" tires. Locate your vehicle's recommended PSI on the driver's side door jamb or owner's manual. Firmly press the gauge onto the valve stem, read the measurement, and adjust air pressure as needed with an air compressor. Re-check the pressure before replacing the valve caps to ensure precision.
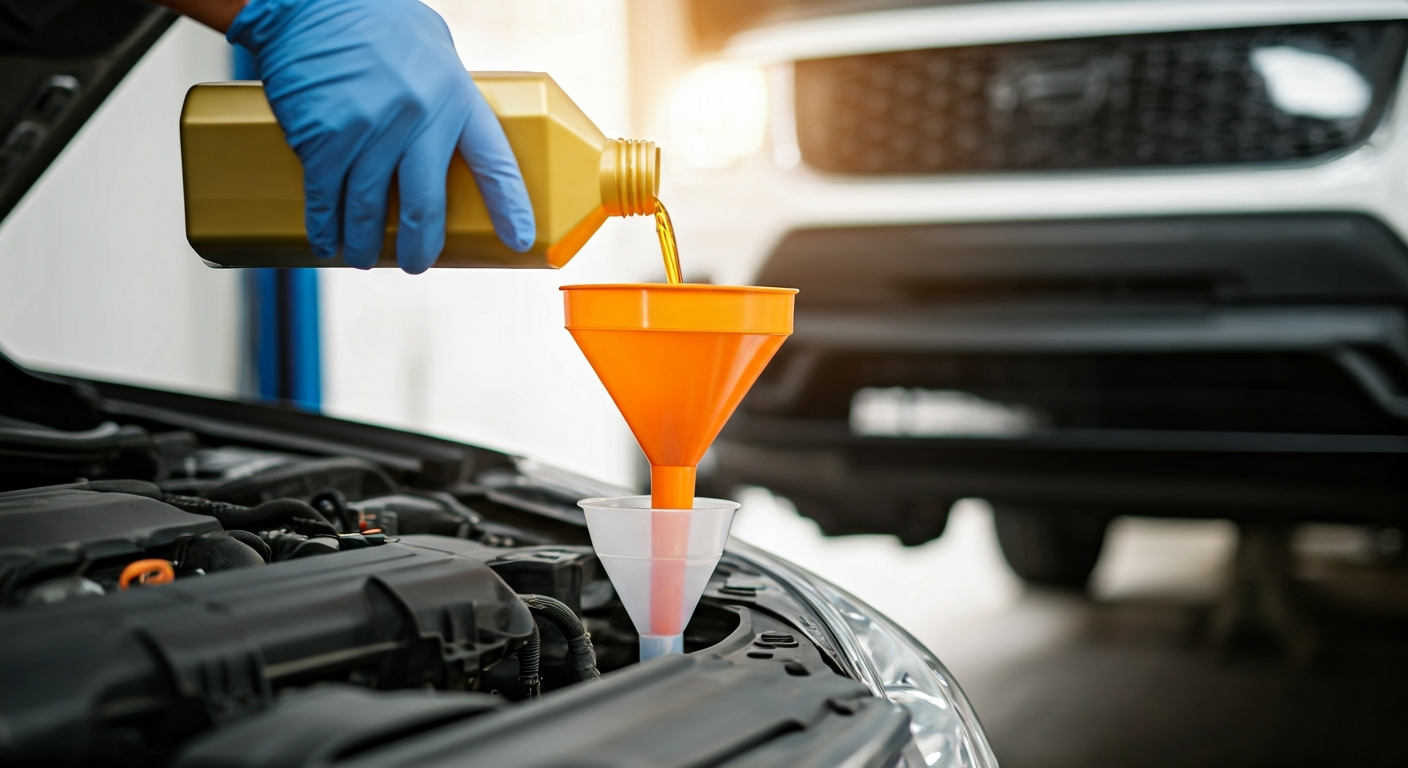
To change your car's oil, safely lift and support the vehicle, drain the old oil from the pan, remove and replace the oil filter, and then refill the engine with new, recommended oil. Always dispose of used oil responsibly. This routine maintenance improves engine performance and longevity significantly.
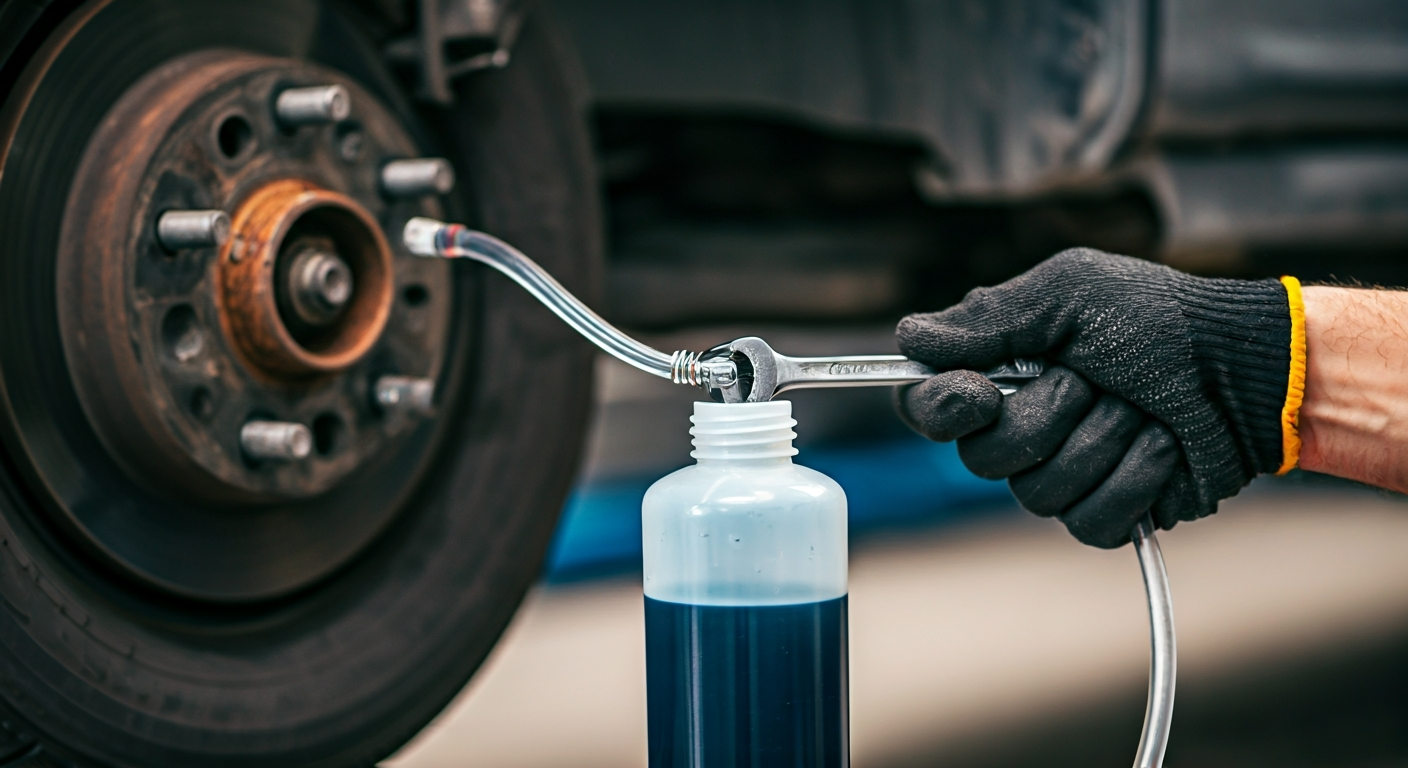
Bleed brakes at home by following a precise sequence, typically starting with the wheel furthest from the master cylinder. Use a brake bleeder kit or a helper to pump the pedal, opening and closing the bleeder screw to push old fluid and air out. Continuously monitor and refill the master cylinder reservoir with fresh brake fluid to prevent reintroducing air into the system.
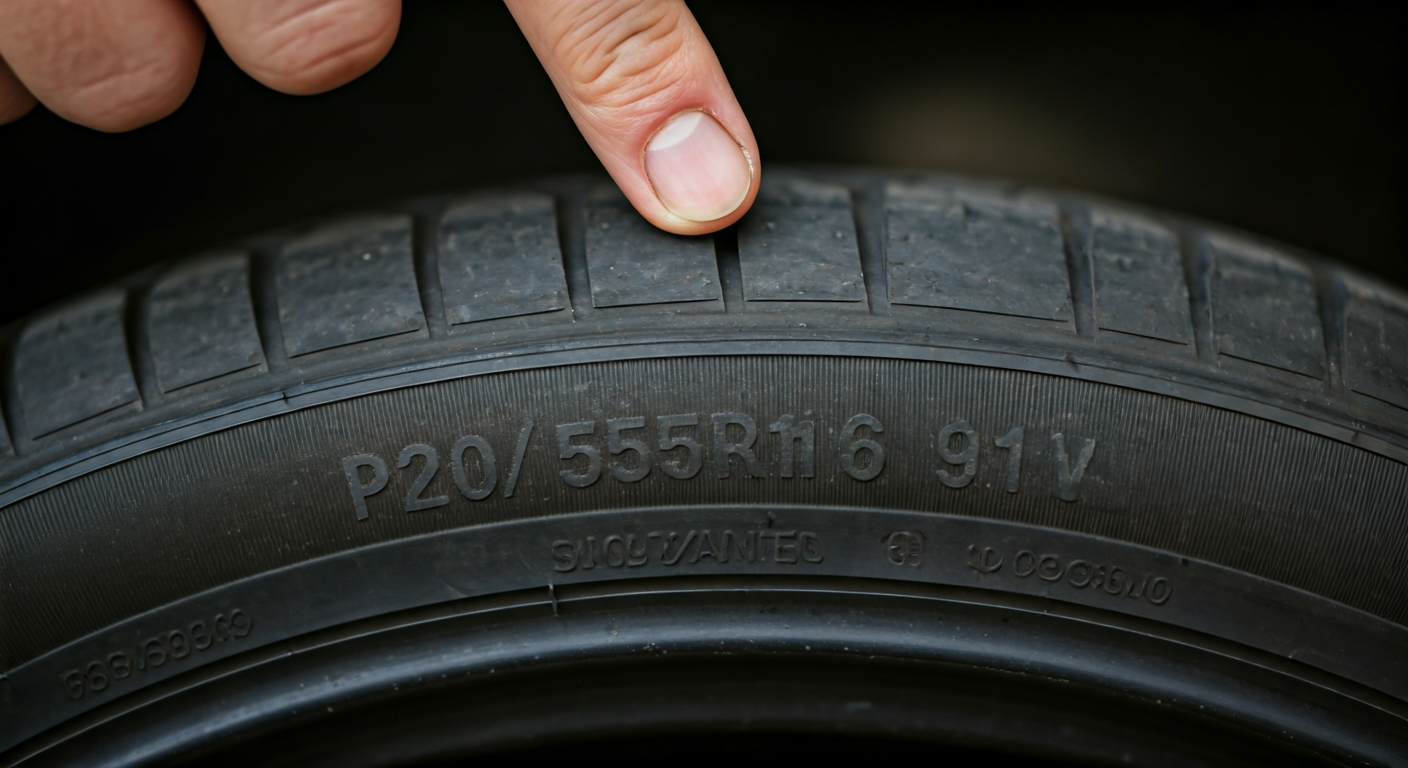
Locate the code on your tire's sidewall, such as "P205/55R16 91V". This sequence specifies the tire type ('P' for passenger), width in millimeters (205), aspect ratio (55% of width), construction type ('R' for radial), rim diameter in inches (16), load index (91), and speed rating ('V'). Each segment provides critical information for matching tires correctly.
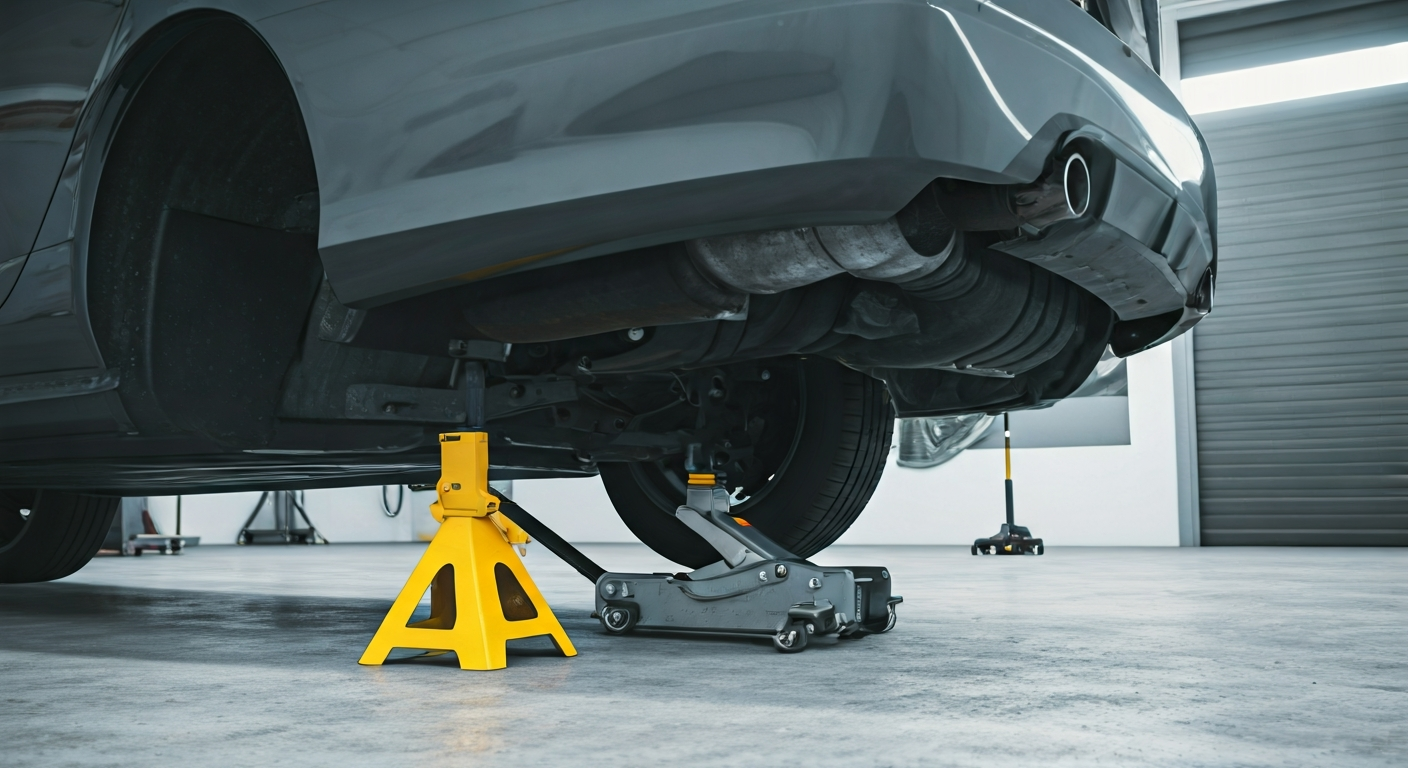
To safely jack up a car, park it on level ground, engage the parking brake, and place wheel chocks. Consult your owner's manual to locate the specific jacking points, then position a floor jack underneath. Slowly raise the vehicle, and immediately place sturdy jack stands at the designated support points. Lower the vehicle gently onto the jack stands, ensuring it is stable before proceeding with any work.
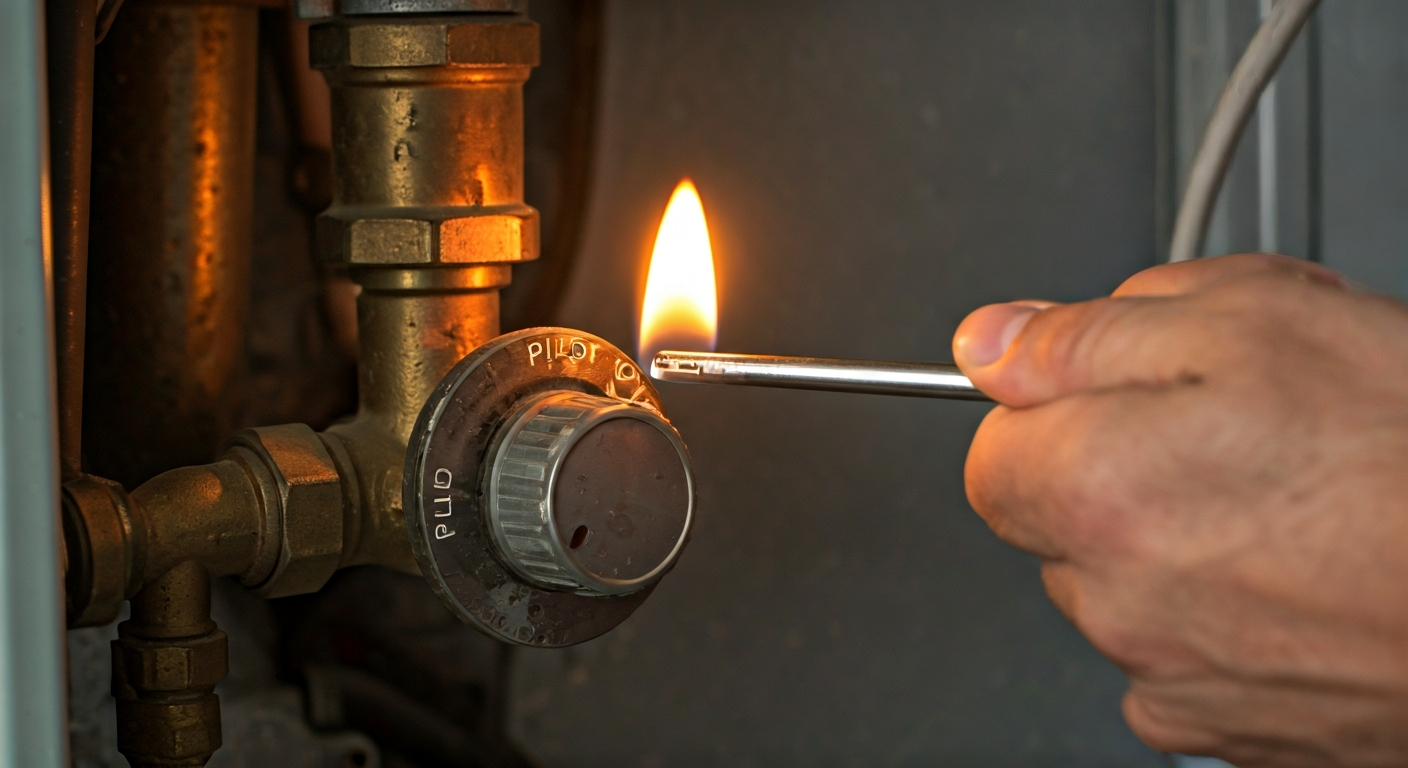
To light a furnace pilot light, first locate the gas valve and pilot assembly. Turn the gas valve to 'OFF' for several minutes to clear any residual gas, then switch it to 'PILOT'. Press and hold the reset button while applying a flame to the pilot opening. Continue holding until the pilot flame remains lit after releasing the button, then turn the gas valve to 'ON'.