What You’ll Learn
Screenshots are incredibly useful, whether you’re saving an important document, sharing a funny conversation, or capturing a specific moment on your screen. Your MacBook Air comes equipped with powerful, yet simple, tools to take all sorts of screenshots. This guide will walk you through every method, from quick keyboard shortcuts to using the dedicated Screenshot app, ensuring you can capture exactly what you need, when you need it. By the end, you’ll be a screenshot pro, able to document your digital life with ease and efficiency.
What You Need
- A MacBook Air running macOS (any version will have basic screenshot capabilities, macOS Mojave or later recommended for the full Screenshot app experience)
- A working keyboard
Quick Steps Overview
- Capture the entire screen to save everything visible.
- Select and capture a specific portion of your screen.
- Capture an individual window or menu.
- Use the versatile Screenshot app for more options like recording or timed captures.
- Copy screenshots directly to your clipboard instead of saving a file.
Detailed Step-by-Step Guide
Step 1: Capture the Entire Screen
This is the simplest way to capture everything currently displayed on your MacBook Air’s screen. Simply press the Shift + Command + 3 keys simultaneously. You’ll hear a camera shutter sound (if your sound is on) and a thumbnail of your screenshot will briefly appear in the bottom-right corner of your screen. By default, this full-screen capture will be saved as a PNG file directly to your desktop, named with the date and time it was taken. It’s perfect for quickly sharing exactly what you’re seeing.
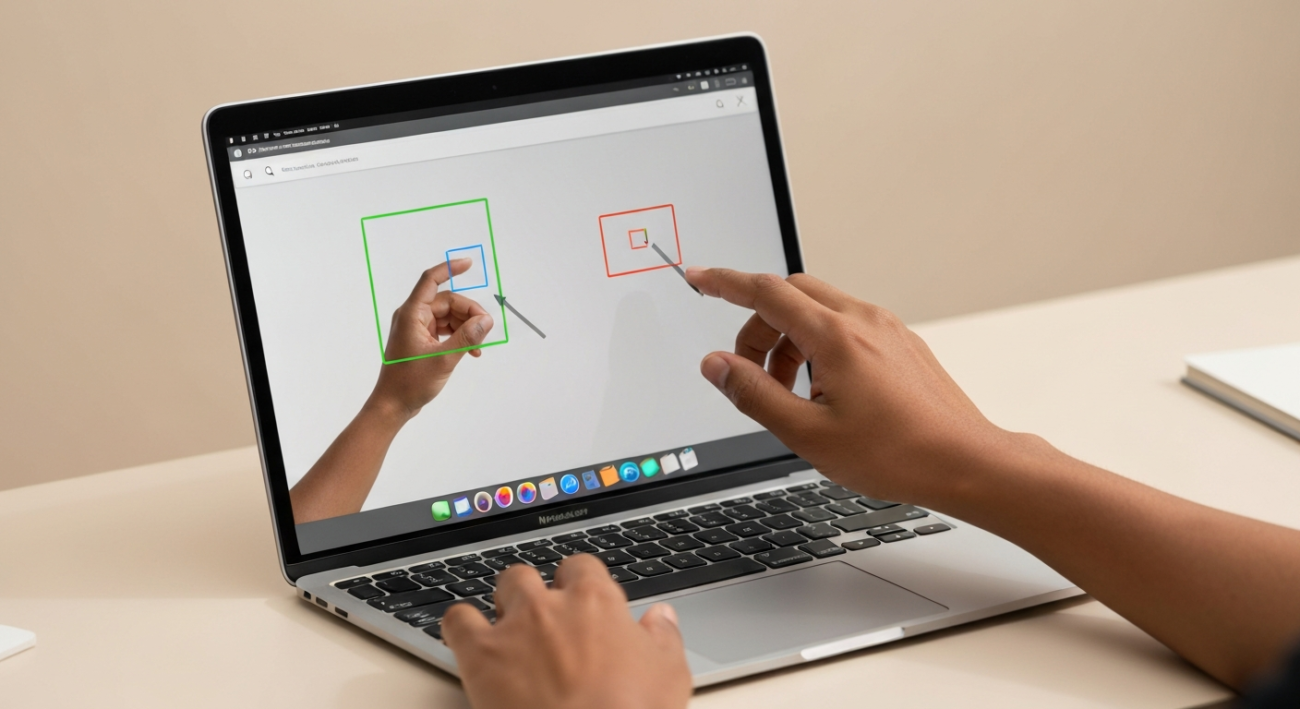
Step 2: Capture a Selected Portion of the Screen
If you only need a specific area of your screen, this method is your go-to. Press Shift + Command + 4. Your cursor will transform into a crosshair with coordinates. Click and drag your mouse to select the exact rectangular area you want to capture. As you drag, you’ll see the dimensions in pixels next to your cursor, helping you get a precise selection. Once you release the mouse button, the screenshot of the selected area will be saved to your desktop. If you change your mind while dragging, simply press the Esc (Escape) key to cancel the capture.
Step 3: Capture a Specific Window or Menu
Sometimes you just need a clean shot of a single application window or a dropdown menu. Press Shift + Command + 4, and then immediately press the Spacebar. Your cursor will change from a crosshair to a small camera icon. Hover this camera icon over the window or menu you wish to capture. The item under the camera will highlight, indicating it will be captured. Click your mouse button, and a screenshot of that specific window or menu will be saved to your desktop, often with a subtle shadow around the edges to give it a professional look. This is fantastic for tutorials or documenting software issues.
Step 4: Utilize the Screenshot App (macOS Mojave and Later)
For more control and advanced options, macOS Mojave and newer versions include a dedicated Screenshot app. Access it by pressing Shift + Command + 5. This will bring up a small toolbar at the bottom of your screen. From here, you can choose to capture the entire screen, a selected window, or a selected portion. You’ll also find options to record your entire screen or a selected portion. What makes this toolbar truly powerful are the ‘Options’ settings, allowing you to choose where to save the screenshot (Desktop, Documents, Clipboard, etc.), set a timer (5 or 10 seconds), and even decide whether to show the floating thumbnail or remember your last selection. It’s your central hub for all things screen capture.
Step 5: Copy Screenshots to Clipboard (No File Saved)
If you want to paste a screenshot directly into an email, message, or document without saving a separate file to your desktop, simply add the Control key to any of the above shortcuts. For example: Control + Shift + Command + 3 for a full-screen capture to clipboard, or Control + Shift + Command + 4 for a selection to clipboard. After performing the shortcut, the screenshot won’t appear on your desktop. Instead, it will be immediately available on your clipboard, ready for you to paste (Command + V) wherever you need it. This is a great way to keep your desktop tidy and streamline your workflow when you don’t need a permanent file.
Common Mistakes to Avoid
- Forgetting where screenshots are saved: By default, all screenshots save to your desktop. If you can’t find them, check there first!
- Not releasing the mouse button: When capturing a selected portion, you must release the mouse button for the capture to finalize and save.
- Panicking and not knowing how to cancel: If you start a capture (Shift + Command + 4) and decide you don’t want it, just press the Esc (Escape) key to cancel.
- Ignoring the Screenshot app (Shift + Command + 5): Many users stick to the basic shortcuts and miss out on the powerful features and customization options available in the dedicated Screenshot app, such as setting a timer or choosing a custom save location.
Pro Tips
- Change the Default Save Location: Tired of your desktop being cluttered? Open the Screenshot app (Shift + Command + 5), click ‘Options’, and choose a different folder under ‘Save To’.
- Change the Screenshot File Format: By default, screenshots are PNGs. If you prefer JPEGs or another format, open Terminal (search for it in Spotlight) and type `defaults write com.apple.screencapture type jpg` then press Enter. Replace `jpg` with `png`, `tiff`, `gif`, or `pdf` as needed.
- Remove Window Shadows: When capturing a window (Shift + Command + 4, then Spacebar), macOS adds a shadow. To disable this, open Terminal and type `defaults write com.apple.screencapture disable-shadow -bool TRUE; killall SystemUIServer` and press Enter. To re-enable, change `TRUE` to `FALSE`.
- Annotate Immediately with Markup: After taking a screenshot, a small thumbnail appears in the corner. Click on it quickly, and you’ll open it in Markup mode, allowing you to crop, add text, arrows, and shapes before saving or sharing. This is a huge time-saver for quick edits.
Final Result
After following these steps, you’ll be able to confidently capture any part of your MacBook Air’s screen, whether it’s a full-screen shot, a precise selection, or a specific window. You’ll know how to save them to your desktop, copy them to your clipboard, and even customize where they go and how they look. You’ll have mastered a fundamental skill for productivity and communication on your Mac.
Summary
Capturing screenshots on your MacBook Air is an essential skill made simple by macOS. With quick keyboard shortcuts like Shift + Command + 3 for full screen, Shift + Command + 4 for selection, and Shift + Command + 4 followed by Spacebar for windows, you can effortlessly grab visual information. For more control, the Screenshot app (Shift + Command + 5) offers advanced options like timers and custom save locations. Remember the Control key to send any capture straight to your clipboard, keeping your desktop clean. By utilizing these tools and tips, you’ll find that documenting, sharing, and saving visual content on your Mac is incredibly intuitive and efficient.