Quick Answer
Changing a tyre is just the first step. Knowing how to torque lug nuts correctly afterward is crucial for your safety. Improperly tightened lug nuts can lead to serious issues, including wheel detachment. This guide shows you exactly what to do. You’ll ensure your wheels are secure and your drive is safe. The result is a properly installed wheel, reducing vibration and preventing potential accidents caused by loose lug nuts.
Why Proper Torquing Works
Using a torque wrench ensures each lug nut is tightened to the manufacturer’s exact specification. This prevents them from being too loose, which can cause the wheel to wobble or even come off. Conversely, over-tightening can stretch or break studs, damage the wheel, or warp brake rotors. Therefore, precise torquing guarantees uniform pressure across the wheel hub. It maintains the integrity of your vehicle’s wheel assembly. It’s a critical safety measure that many drivers overlook after a tyre change. For a comprehensive overview of the entire process, consider reading our complete guide to changing a tyre.
What You Need
- Vehicle owner’s manual
- Torque wrench (beam or click-style)
- Socket set compatible with your lug nuts
- Jack and jack stands (if not already used for tyre change)
- Wheel chocks (for safety)
Step-by-Step Instructions: How to Torque Lug Nuts
Step 1: Safely Position Your Vehicle and Gather Tools
Before you begin, ensure your vehicle is on a flat, level surface. Engage the parking brake. If you haven’t already, place wheel chocks under the tyres that remain on the ground. This prevents any accidental movement. Next, gather all your necessary tools. This includes your torque wrench and the correct socket size for your lug nuts. Having everything ready streamlines the process. If you’re still getting set up after a roadside incident, our guide on changing a flat tyre offers helpful tips.
Step 2: Find Your Vehicle’s Lug Nut Torque Specification
This is a critical step to properly how to torque lug nuts. Your vehicle’s owner’s manual will contain the specific torque setting (measured in foot-pounds, ft-lb, or Newton-meters, Nm) for your lug nuts. This specification is unique to your car model. Never guess this number or use a generic setting. Incorrect torque can lead to dangerous situations. If you cannot find your manual, a quick online search for your car’s make, model, and year plus ‘lug nut torque spec’ often yields results. Confirm the source’s reliability.
Step 3: Set Your Torque Wrench
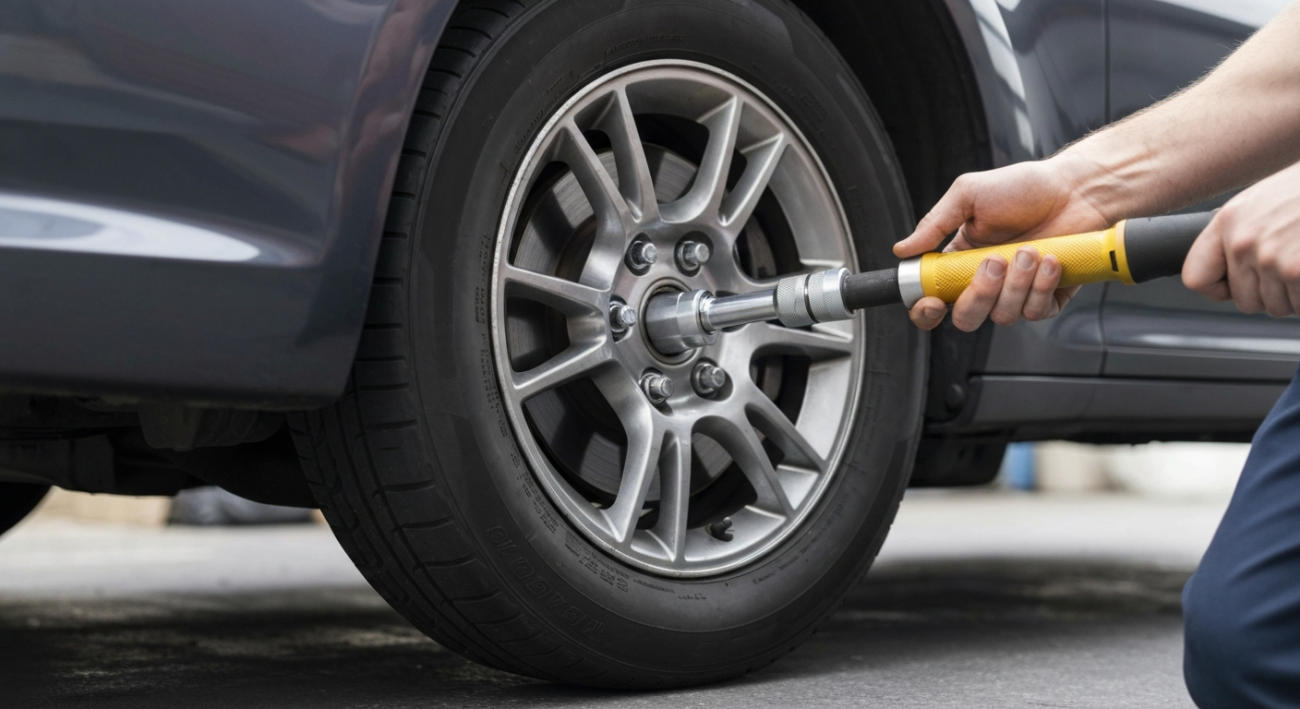
Adjust your torque wrench to the specification you found in your owner’s manual. For a click-style torque wrench, you’ll turn the handle until the desired number aligns with the marker. Then, you typically lock it into place. For a beam-style wrench, you simply monitor the needle as you apply pressure. Always ensure your torque wrench is calibrated and in good working order. Using the correct tools is fundamental for vehicle safety. You can find more about essential tools for changing a tyre in our resource.
Step 4: Tighten Lug Nuts in a Star Pattern
With the wheel slightly off the ground (just enough to spin freely), begin tightening the lug nuts. Use the torque wrench in a star or cross pattern. This means you tighten one lug nut, then move to the one directly across from it. Skip the adjacent ones. This method ensures even pressure is applied to the wheel. It helps the wheel seat properly against the hub. Tighten each lug nut until the torque wrench clicks (for click-style) or the needle reaches the desired setting (for beam-style). You should do this in two stages: first, tighten to about half the specified torque, then go back and tighten to the full torque setting. Lower the vehicle fully before the final check.
Step 5: Perform a Final Torque Check on the Ground
Once the vehicle is fully lowered and resting on the ground, double-check all lug nuts. Go around the wheel again, following the star pattern. Listen for the click or watch the needle on your torque wrench. This final check ensures that all lug nuts are correctly seated and torqued. It confirms the wheel is perfectly secure. It’s a quick but essential step to guarantee safety. Never use an impact wrench for final torquing. These tools are designed for speed, not precision, and can easily overtighten or damage components.
Step 6: Recheck Lug Nuts After 50-100 Miles
It’s highly recommended to recheck your lug nuts after driving 50 to 100 miles. Wheels can shift slightly as they settle onto the hub, potentially causing lug nuts to loosen. This recheck, often called a ‘retorque,’ is a crucial safety measure. It ensures everything remains secure after initial use. Simply repeat Step 5. This final check adds an extra layer of protection, giving you peace of mind on the road.
Common Mistakes
- Using an impact wrench for final tightening
- Not following the star pattern
- Guessing the torque specification
- Forgetting to recheck lug nuts after driving
- Using lubricant on lug nut threads
- Not using a torque wrench at all
If Something Doesn’t Work
Lug nuts feel loose even after torquing.
Re-lift the vehicle, visually inspect the studs and wheel for damage. Ensure the wheel is flush against the hub. Retorque carefully following the star pattern from scratch. If issues persist, seek professional help.
The torque wrench doesn’t click or hold a setting.
Your torque wrench might be faulty or improperly set. Check its calibration or try another wrench if possible. Ensure it’s not set to ‘loosen’ if it has that feature. Read the wrench’s instructions carefully.
You hear a knocking or clicking sound while driving.
This could indicate loose lug nuts. Pull over safely immediately. Inspect the wheel and retorque all lug nuts to specification. If the sound continues after ensuring proper torque, consult a mechanic promptly.
Expected Result
Upon completing these steps, your wheel will be securely fastened to your vehicle. All lug nuts will be tightened to the exact manufacturer’s specifications. This ensures optimal safety and performance. You will experience a smooth, stable ride without vibrations or concerns about loose wheels. This careful attention to detail extends the life of your tyres and vehicle components.
Quick Summary
Properly torquing lug nuts after a tyre change is a non-negotiable safety step. Always use a calibrated torque wrench and follow your vehicle’s specific settings. A star pattern ensures even tightening. Remember to recheck the torque after 50-100 miles. Following these guidelines keeps your wheels secure and you safe on the road.