Get Your Car Running Again Fast
A dead car battery can be frustrating, but knowing how to jump start a car is a simple skill that can save you time and hassle. By correctly connecting jumper cables from a working vehicle to yours, you can provide the necessary power to restart your engine. This guide will walk you through the process step-by-step, ensuring you do it safely and effectively, getting you back on the road in no time.
The Science Behind a Jump Start
When your car battery dies, it simply doesn’t have enough electrical charge to turn over the engine. A jump start works by temporarily linking your dead battery to a fully charged battery from another vehicle. This ‘donor’ battery supplies the surge of electricity needed to start your car’s engine. Once your engine is running, your car’s alternator takes over, recharging your battery as you drive.
What You’ll Need for a Jump Start
- A working vehicle with a fully charged battery
- A set of jumper cables in good condition
- Safety gloves (optional but recommended)
- Eye protection (optional but recommended)
Step-by-Step Instructions to Jump Start Your Car
Step 1: Prepare Both Vehicles Safely
First, park the working car next to the disabled car, ensuring they are close enough for the jumper cables to reach but not touching. Turn off both vehicles and engage their parking brakes. Remove keys from the ignition of the dead car to prevent accidental starting. Make sure headlights, radio, and any other accessories are off in both cars. Pop both hoods and locate the batteries. Look for any corrosion on the battery terminals; if present, gently clean it off with a wire brush.
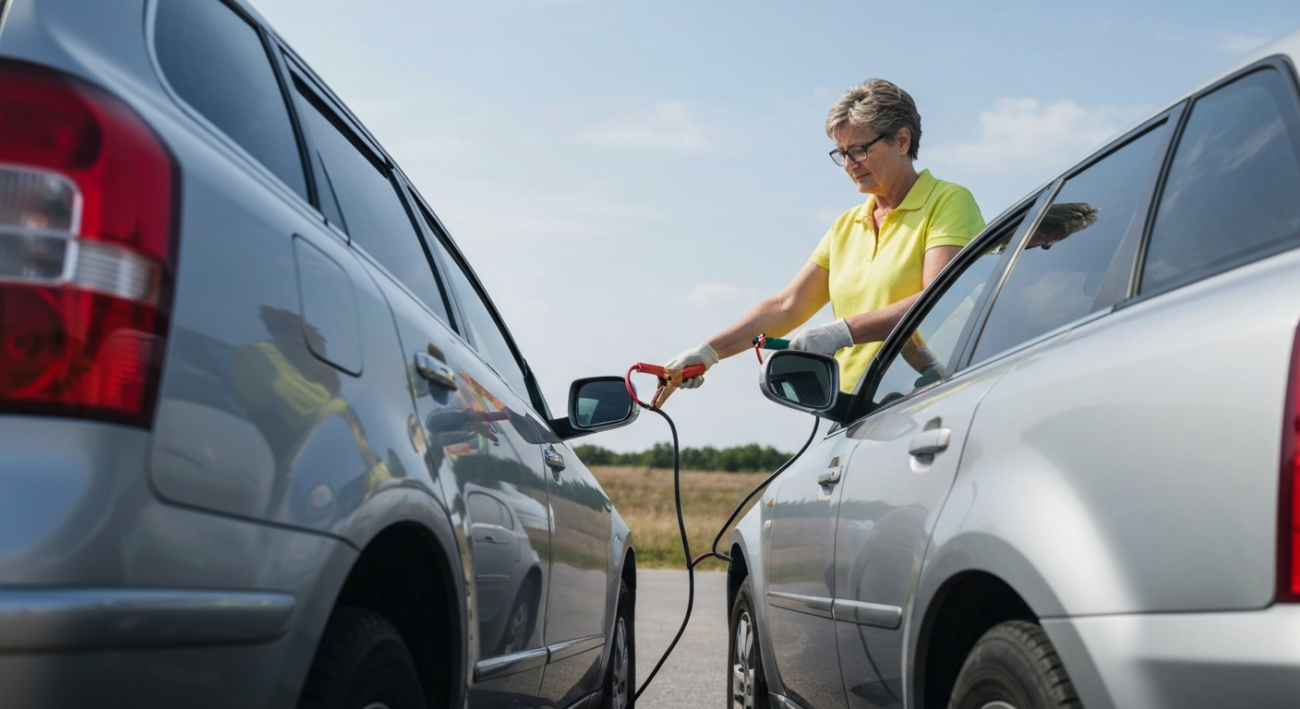
Step 2: Connect the Red Jumper Cable Correctly
Now, take the red (positive) jumper cable. Connect one end to the positive (+) terminal of the dead battery. This terminal is usually marked with a plus sign and is larger. Then, connect the other end of the red cable to the positive (+) terminal of the working car’s battery. Double-check that these connections are secure and firm. This step ensures that the positive current flows correctly from the donor car to the receiving car.
Step 3: Attach the Black Jumper Cable
Next, take the black (negative) jumper cable. Connect one end to the negative (-) terminal of the working car’s battery. This terminal is usually marked with a minus sign. For the other end of the black cable, find an unpainted metal surface on the engine block of the dead car, away from the battery itself and any moving parts. This grounding point helps dissipate any potential sparks safely away from the battery, which can sometimes emit flammable hydrogen gas. Do not connect it to the negative terminal of the dead battery directly.
Step 4: Start the Working Vehicle
With all cables connected, start the engine of the working car. Let it run for about five to ten minutes. This allows the donor battery to transfer a sufficient charge to the dead battery. During this time, you might notice a slight difference in the engine sound as it works to supply power. Keep an eye on the connections to ensure they remain firm and haven’t come loose.
Step 5: Attempt to Jump Start a Car
After the charging period, try to start the disabled car. If it doesn’t start immediately, give it a few more minutes to charge, then try again. If the car starts, let it run for a few minutes before disconnecting the cables. If it still won’t start after several attempts, there might be a different issue, such as a faulty starter or alternator. It might be time to consider professional assistance if you’re struggling to get your vehicle running. For more general advice on keeping your car in top shape, check out this guide on car maintenance basics.
Step 6: Safely Disconnect Cables After You Jump Start a Car
Disconnect the cables in the reverse order of connection to prevent any sparks or short circuits. First, remove the black cable from the unpainted metal surface of the now-running car. Then, remove the black cable from the negative terminal of the donor car. Next, remove the red cable from the positive terminal of the donor car, and finally, remove the red cable from the positive terminal of your car. Drive your car for at least 20-30 minutes to allow the alternator to fully recharge the battery.
Avoid These Common Jump Start Errors
- Connecting cables in the wrong order, causing sparks or damage
- Letting vehicles touch during the process
- Not waiting long enough for the dead battery to charge
- Connecting the black cable directly to the dead battery’s negative terminal
- Using damaged or frayed jumper cables
What to Do If Your Car Won’t Start
Car clicks but doesn’t start
This often means the battery is still too low or the connections aren’t strong enough. Double-check all cable connections and let the donor car charge the dead battery for a longer period (10-15 minutes). Ensure terminals are clean.
No sound or click when turning the key
The issue might not be the battery. Check if the battery terminals are corroded or loose. It could also indicate a problem with the starter motor, ignition switch, or a blown fuse. Consider seeking professional diagnosis.
Car starts, then immediately dies
This suggests the dead battery isn’t holding a charge or the alternator isn’t working correctly. Drive it to a mechanic or an auto parts store to have the battery and charging system tested. The car needs to run on its own power.
Enjoy Your Restarted Vehicle
Once successfully jump-started, your car should be running smoothly. The engine will purr, and all electrical components will function as expected. Remember to drive your car for at least 20-30 minutes after a jump start. This allows your alternator ample time to replenish the battery’s charge. If your battery repeatedly dies, it might be time for a replacement. A successful jump start means you’ve handled a common car problem like a pro, getting yourself back on the road safely and efficiently.
Quick Recap: Mastering the Jump Start
Knowing how to jump start a car is a vital skill for any driver. By following the correct, safe steps—connecting positive to positive, then negative to a ground, charging, and then starting—you can confidently get a disabled vehicle running again. Always prioritize safety and ensure your cables are in good condition. You’ve got this!