A projector mounted on the ceiling projecting a sharp movie onto a large screen in a modern living room.

How to set up a projector at home

Ali Hassan
Ali Hassan
Writer
Setting up a home projector transforms your viewing experience, bringing the big screen directly into your living space. This guide simplifies the process, ensuring you can quickly enjoy movies, games, or presentations with impressive visuals. Many modern projectors offer user-friendly interfaces and automatic adjustments, making installation less daunting than it might seem. By understanding a few key steps, from proper placement to connecting your devices and fine-tuning the image, you will achieve a professional-quality home theater setup. Follow these clear instructions to unleash your projector's full potential.
Practical Solution
To set up a home projector, choose an optimal location for projection and screen placement. Connect your power and input devices, then power on the projector. Adjust the image focus, zoom, and keystone correction for a clear, rectangular picture. Finally, align the projected image precisely with your screen and configure audio output for a complete home theater experience.

What This Guide Explains

This guide provides a comprehensive walkthrough for setting up your home projector. You will learn optimal projector placement, how to connect various input devices, and essential steps for image alignment and optimization. We also cover crucial considerations like audio integration and troubleshooting common issues, ensuring you gain confidence in creating an immersive home entertainment system.

Essential Tools for Setup

Measuring Tape
Use this to accurately measure distances for projector placement and screen size.
Spirit Level
Ensures your projector and screen are perfectly horizontal and vertical for a straight image.
Screwdriver Set
Needed for mounting brackets or assembling stands, if applicable.

Required Setup Materials

Projector Screen
Provides a dedicated, reflective surface for optimal image quality and brightness.
HDMI Cables
Connects your input devices (Blu-ray player, streaming stick, console) to the projector.
Power Strip with Surge Protection
Protects your projector and connected devices from electrical spikes.

Before You Begin Setup

Room Preparation and Placement

Prepare your room by minimizing ambient light using blackout curtains or blinds. Choose a projection surface; a dedicated projector screen offers the best image quality, but a smooth, light-colored wall can also work. Determine the ideal projector placement (ceiling, table, or rear shelf) based on its throw ratio and your desired screen size. Use a throw distance calculator, often available on projector manufacturer websites or Projector Central's Throw Distance Calculator, to find the perfect spot. Ensure power outlets are accessible and plan cable routing to avoid tripping hazards.

Understand Projector Basics

Familiarize yourself with your projector's basic features and settings. Consult your projector's manual to understand its specific inputs, lens shift capabilities, and menu navigation. Pay attention to its native resolution, brightness (lumens), and contrast ratio. Understanding these elements, along with Understanding Projector Specifications, will help you optimize performance and troubleshoot issues more effectively. Knowing your projector's capabilities ensures you can maximize its potential for a superior viewing experience.

Step-by-Step Projector Setup

1

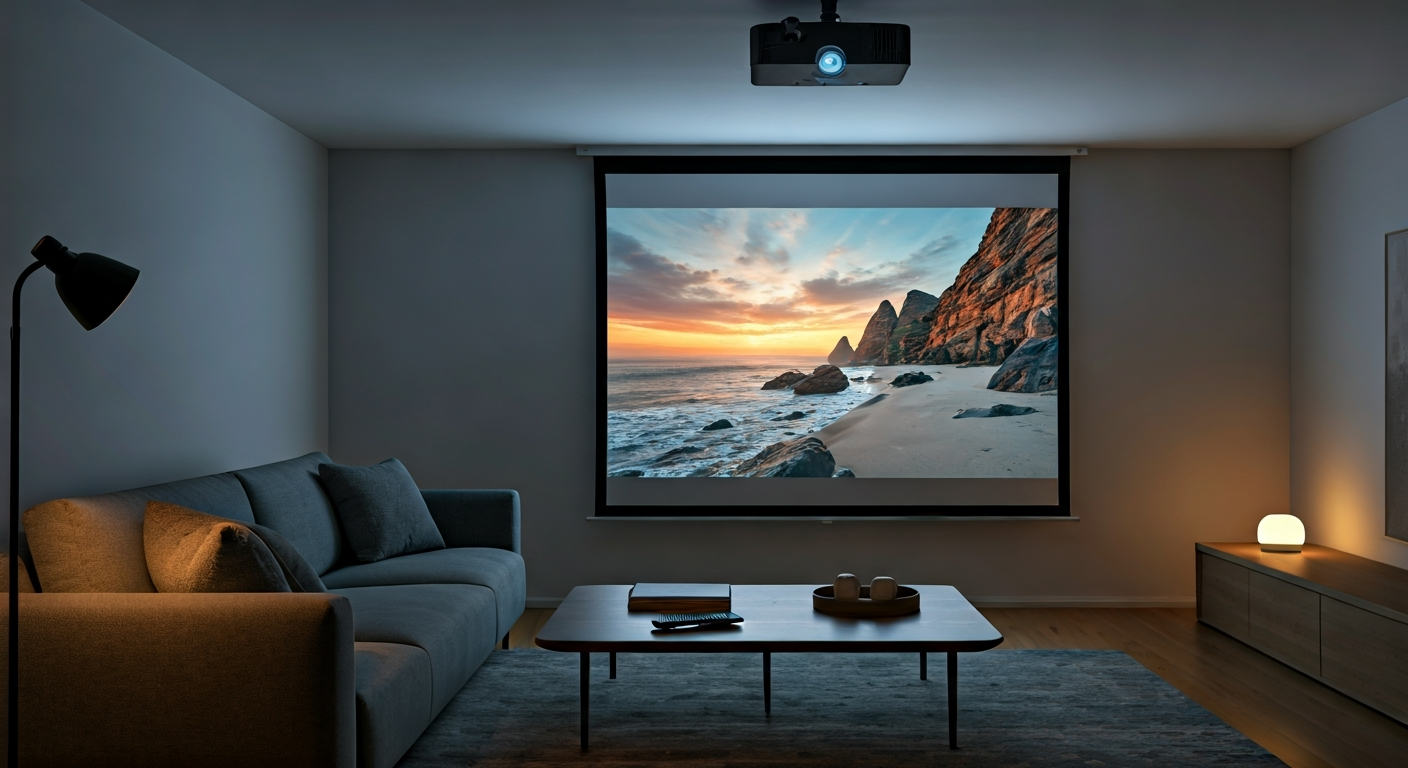
Position Projector and Screen

Place your projector in its determined location, whether on a stand, ceiling mount, or shelf. Ensure it is stable and level. Position the projector screen, making sure it is also level and centered relative to your intended viewing area. Do not permanently mount anything until you confirm image alignment later.
2

Connect Power and Input Devices

Plug your projector into a power outlet. Connect your desired input devices, such as a Blu-ray player, gaming console, or streaming stick, to the projector's HDMI inputs using appropriate cables. Refer to our guide on Connecting Devices to Your Projector for detailed instructions on various connection types. Power on all connected devices.
3

Power On and Select Source

Turn on the projector using its power button or remote control. It may take a moment to warm up. Use the projector's remote to navigate to the 'Input' or 'Source' menu and select the correct HDMI input corresponding to your connected device. You should now see an image projected.
4

Adjust Focus and Zoom

Locate the focus and zoom rings or buttons on your projector lens. Adjust the zoom first to achieve the desired image size on your screen. Then, carefully turn the focus ring until the projected image appears sharp and clear across the entire screen, from corner to corner.
5

Apply Keystone Correction

If your projector is not perfectly perpendicular to the screen, the image might appear trapezoidal (wider at the top or bottom). Use the keystone correction feature (digital or optical) on your projector to square up the image, making it perfectly rectangular. Avoid excessive digital keystone correction, as it can reduce image quality.
6

Fine-Tune Image Alignment

With focus, zoom, and keystone adjusted, precisely align the projected image with the borders of your screen. This might involve small physical adjustments to the projector's position or screen placement. Some projectors offer lens shift features, allowing you to move the image horizontally or vertically without moving the projector itself.
7

Configure Audio Output

Projectors often have small built-in speakers, but for a true home theater experience, connect to external audio. Use the projector's audio output (usually a 3.5mm jack or optical audio) to route sound to a soundbar, AV receiver, or external speakers. For more details on optimizing sound, refer to Optimizing Audio for Your Home Theater. Adjust volume settings on both your projector and external audio system.
8

Optimize Image Settings

Access your projector's picture settings menu. Adjust brightness, contrast, color, and sharpness to suit your viewing environment and personal preference. Many projectors offer preset modes (e.g., Cinema, Dynamic, Game) which provide a good starting point. Experiment with these settings for the best visual quality.

Expert Setup Tips

Always turn off the projector and allow it to cool down before unplugging or moving it, prolonging lamp life.
Invest in good quality HDMI cables; longer runs especially benefit from higher-spec cables to prevent signal degradation.
For permanent setups, consider a universal ceiling mount for precise positioning and a cleaner look.
Regularly clean your projector's lens with a microfiber cloth to maintain image clarity.
Use a calibration disc or professional calibration service to get the most accurate colors and contrast from your projector.

Common Setup Mistakes

Ignoring Throw Distance
Incorrectly placing the projector too close or too far from the screen results in an image that is too small or too large, or blurry if outside the lens's capabilities.
Overusing Digital Keystone Correction
While helpful, excessive digital keystone correction can distort the image and reduce resolution, making the picture appear soft or pixelated.
Neglecting Room Lighting
Projectors perform best in dark environments. Ambient light washes out the image, significantly reducing contrast and color vibrancy.
Forgetting Audio Setup
Relying on built-in projector speakers often leads to disappointing sound quality, detracting from the immersive visual experience.

When to Call a Professional

While setting up a projector is a manageable DIY task for most, certain situations warrant professional assistance. If you are attempting a complex custom installation, such as in-wall cabling, ceiling-recessed screens, or integrating into a smart home system with multiple zones, an expert can ensure seamless integration and optimal performance. Professionals can also provide advanced calibration services to fine-tune image quality beyond what basic settings offer. Additionally, if you encounter persistent technical issues that troubleshooting doesn't resolve, or if you prefer the convenience of having someone handle all the technical details, hiring an AV installer is a practical choice. They possess specialized tools and knowledge to tackle intricate setups safely and efficiently, guaranteeing a top-tier home theater experience without the hassle.

Frequently Asked Questions

Was this article helpful?

Vetted by 13 professional readers

About the Author

Ali Hassan
Ali Hassan
Verified Author
Writer

Professional contributor.

Related Articles

See All Topics
Roach bait station strategically placed in a clean kitchen corner, with subtle lighting, representing effective home pest control.

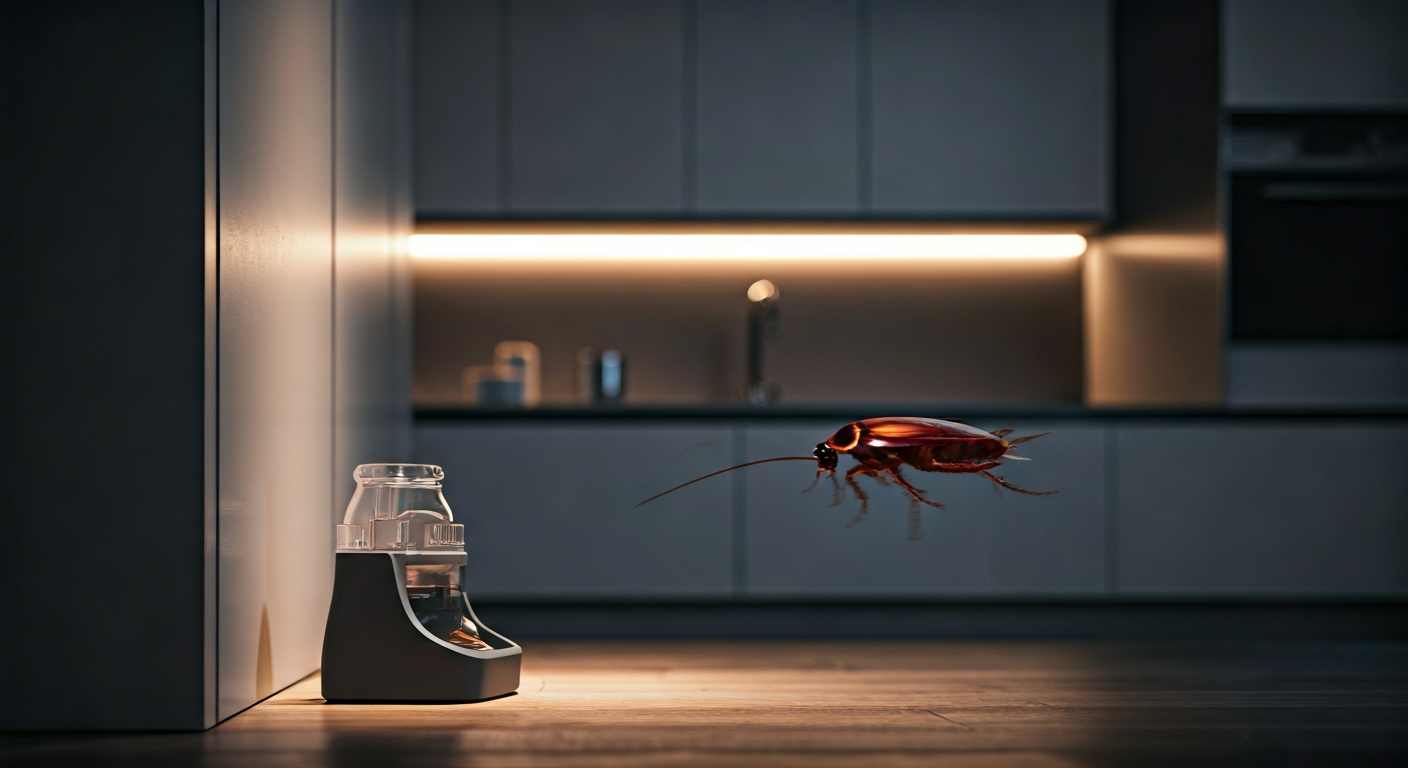
Eliminate roaches by first identifying their hiding spots and entry points. Deploy bait stations and sticky traps strategically in these areas. Maintain rigorous sanitation, seal cracks and crevices, and remove all food and water sources. Consistent application of these methods, combined with vigilant monitoring, effectively eradicates infestations and prevents their return.

14 Helpful
Insight
A hand connects a white Chromecast into a TV's HDMI port, with the power cable also attached. A smartphone nearby shows the Google Home app.

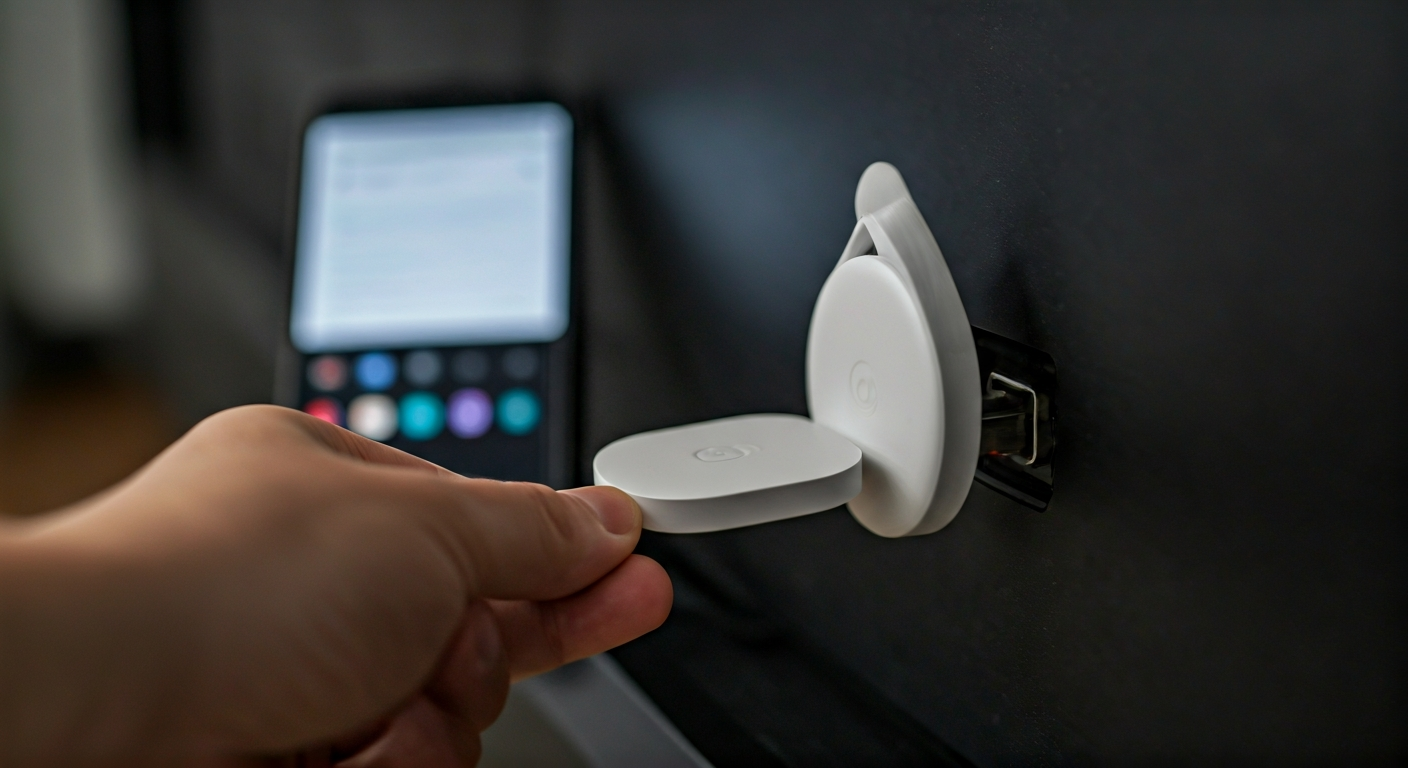
Connect your Chromecast device to an HDMI port and a power source on your TV. Download the Google Home app on your mobile device. Open the app, follow the on-screen prompts to find and set up your new device, connect it to your home Wi-Fi network, and link it to your Google account. Confirm the code displayed on your TV matches the app to complete the pairing process.

18 Helpful
Insight
A happy dog trading a low-value toy for a high-value treat from a human hand, illustrating positive resource guarding training.

Safely address resource guarding by consistently applying positive reinforcement, primarily through a "trade-up" strategy and gradual desensitization. Teach your dog that human presence around their resources leads to better outcomes, such as higher-value items. Always prioritize safety, avoid punishment, and proactively manage their environment to prevent guarding incidents and build trust.

15 Helpful
Insight