Quick Answer: Fixing Common Electrical Glitches
A blown car fuse is a common culprit when an electrical component in your vehicle suddenly stops working. This could be anything from your radio to your power windows or even your headlights. Fortunately, learning how to replace a blown car fuse is a straightforward task that most car owners can tackle themselves with minimal tools and effort. By following a few simple steps, you can quickly identify the faulty fuse and swap it out, restoring full functionality to your car’s electrical system and potentially saving you a trip to the mechanic. This is a crucial skill for understanding basic car maintenance.
Understanding Why Your Car Fuse Blows
Car fuses are essential safety devices designed to protect your vehicle’s electrical components from power surges and short circuits. Think of them as the weakest link in an electrical chain. If too much current flows through a circuit, the fuse sacrifices itself by melting its internal wire, breaking the circuit and preventing damage to more expensive components like your car’s computer or wiring. When a fuse blows, it means it did its job. Replacing it with a new, correctly rated fuse simply re-establishes the circuit, allowing electricity to flow again and the component to work as intended.
What You’ll Need to Check and Replace a Blown Car Fuse
- Your car’s owner’s manual (essential for fuse box diagrams)
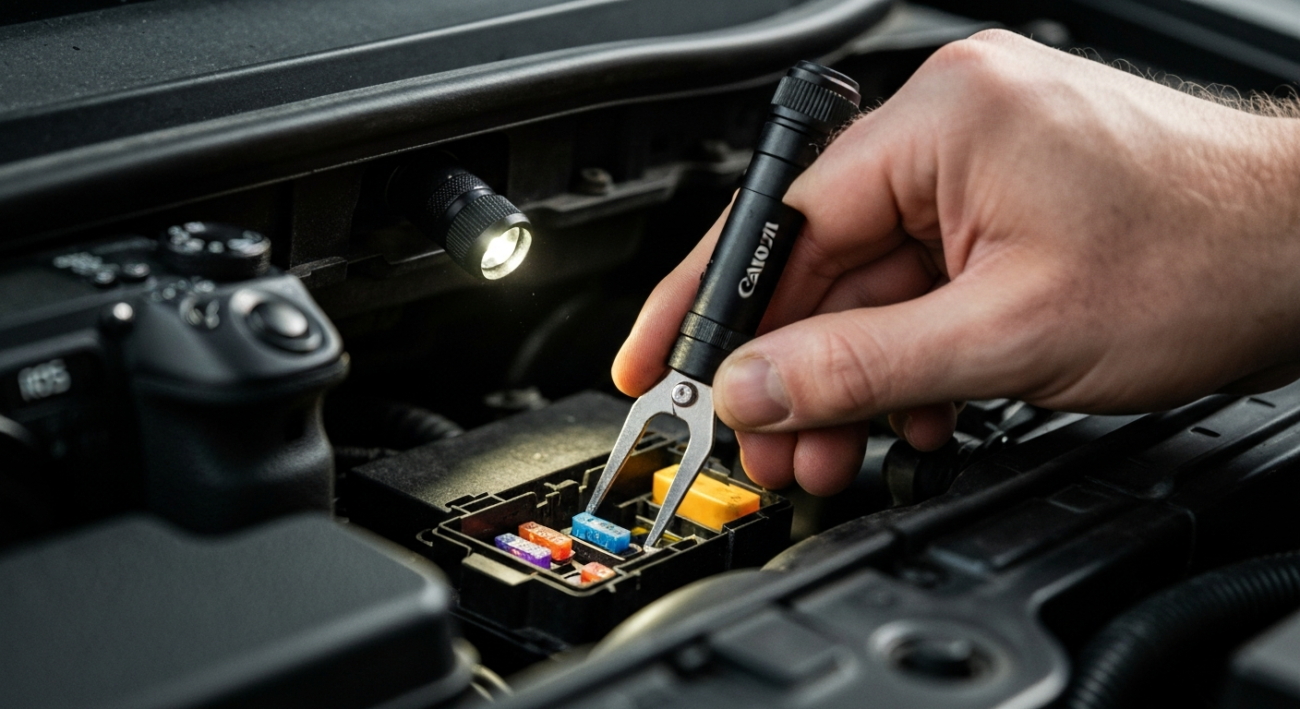
- A flashlight (for better visibility in dark areas)
- A fuse puller (often found in your car’s fuse box or sold separately)
- Replacement fuses of the correct amperage (check your owner’s manual or the fuse box lid for types and ratings)
- Optional: A fuse test light or multimeter (to quickly verify if a fuse is blown)
Step-by-Step Guide: How to Replace a Blown Car Fuse
Step 1: Identify the Affected System
Before you can replace a blown fuse, you need to know which electrical system is malfunctioning. Did your radio suddenly go silent? Are your power windows refusing to roll down? Does a specific light not turn on? Pinpointing the non-working component helps you narrow down which fuse to inspect. Consult your car’s owner’s manual to find out which fuse corresponds to the problematic system. This step saves you a lot of time by avoiding a full, unnecessary inspection of every single fuse in your vehicle.
Step 2: Locate Your Car’s Fuse Box
Most vehicles have at least two fuse boxes: one under the hood and another inside the cabin, often under the dashboard, glove box, or in the side panel near the driver’s door. Your owner’s manual will provide exact locations and diagrams for both. The under-hood fuse box typically handles major components like the engine and ABS, while the interior box usually covers accessories like the radio, interior lights, and power windows. Once located, open the fuse box cover, which often has a diagram on its underside.
Step 3: Identify the Blown Fuse
With the fuse box open, compare the diagram on the lid or in your manual to the layout of the fuses. Locate the fuse responsible for the malfunctioning component. A blown fuse usually has a visibly broken or melted metal wire inside its plastic casing. If it’s not obvious, you can use a fuse test light by touching each end of the fuse – if both sides light up, the fuse is good. If only one side lights up, or neither does, the fuse is likely blown. Alternatively, you can pull each suspect fuse and visually inspect it. Remember to always use the flashlight for a clearer view.
Step 4: Carefully Remove the Blown Fuse
Once you’ve identified the blown fuse, use the fuse puller to carefully grasp it and pull it straight out. Fuse pullers are designed to fit snugly around the fuse, making removal easy and preventing damage to other fuses or the fuse box itself. Avoid using metal tools like pliers or screwdrivers directly, as they can cause a short circuit or damage the fuse terminals. If you don’t have a fuse puller, some plastic needle-nose pliers might work, but be very gentle.
Step 5: Insert the New Fuse
This is a critical step: ensure the replacement fuse has the exact same amperage rating as the original blown fuse. Never insert a fuse with a higher amperage rating, as this can lead to serious electrical damage or even a fire by allowing too much current to flow. Gently push the new fuse into the empty slot until it’s firmly seated. You should feel a slight click or resistance. Double-check that it is fully seated and not loose.
Step 6: Test the System and Close Up
After inserting the new fuse, turn on your car’s ignition (you might not need to start the engine) and check if the previously malfunctioning component is now working. If your radio comes back to life, or your windows roll up and down, congratulations – you’ve successfully replaced the blown fuse! Once you’ve confirmed everything is working, replace the fuse box cover securely to protect the fuses from dirt and moisture. Keep a few spare fuses of common ratings in your car for future emergencies.
Common Mistakes to Avoid
- Using a fuse with the wrong amperage (always match the original rating).
- Not inspecting other fuses if the problem isn’t immediately solved.
- Forcing a fuse into the wrong slot (they are keyed for specific sizes).
- Ignoring the underlying cause if a fuse repeatedly blows (this indicates a deeper electrical issue).
- Forgetting to replace the fuse box cover, exposing components to elements.
What to Do If Replacing Your Car Fuse Doesn’t Work
The new fuse blows immediately or very quickly.
If your new fuse blows right after installation, or very soon after, it usually indicates a short circuit or an overloaded circuit. This means the problem isn’t just the fuse, but something deeper in the electrical system. You should avoid putting in another fuse, as it will likely just blow again and could potentially cause further damage. It’s best to consult a professional mechanic or an auto electrician to diagnose and fix the root cause. This could be due to frayed wiring, a faulty component, or another issue. If your car won’t start but the lights work, it’s also likely a different electrical problem that warrants professional attention.
The component still doesn’t work, even with a good fuse.
If the fuse is good (either the original wasn’t blown, or the new one is intact, but the component still doesn’t function), the issue lies elsewhere. Double-check your owner’s manual to ensure you checked the correct fuse. It’s possible another fuse on a related circuit is also blown. If not, the component itself might be faulty, or there could be a problem with the wiring leading to it, a switch, or a relay. In this scenario, it’s often best to seek professional diagnosis.
Expected Result: Restored Functionality
After successfully checking and replacing a blown car fuse, the specific electrical component that was malfunctioning should now be fully operational again. Your radio will play, your power windows will move, or your headlights will shine brightly. You’ll have the satisfaction of knowing you’ve fixed a common car problem yourself, saving time and money. This simple repair demonstrates the power of basic automotive knowledge and empowers you to handle minor electrical hiccups with confidence.
Quick Summary: Empowering Yourself with DIY Car Repairs
Dealing with a blown car fuse can be a minor annoyance, but it’s a very solvable problem. By understanding how to identify, remove, and replace a faulty fuse with the correct amperage, you can quickly restore essential functions in your vehicle. Always consult your car’s owner’s manual, use the right tools, and never substitute a fuse with a higher rating. While most fuse replacements are straightforward, recurring issues warrant professional attention. This practical skill is a valuable addition to any car owner’s toolkit, promoting self-sufficiency and ensuring your car’s electrical systems run smoothly.